QUESTING IN STYLE - DESIGNING NO LOVE LOST’S HOVERBIKES
Can you imagine NO LOVE LOST without its sleek and speedy hoverbikes? As the way to traverse the dangerous lands of Drosera – we can’t either. But if you read one of our earlier dev blogs or checked out our earliest footage of the game over on our YouTube channel , you’d know it wasn’t always in the plans!
Travel down memory lane with Guillaume, one of our 3D artists, as he brings us through what his 3D modeling process was with this futuristic, fantasy form of travel!
CONCEPTING THE HOVERBIKES - THE PRE-PROCESS
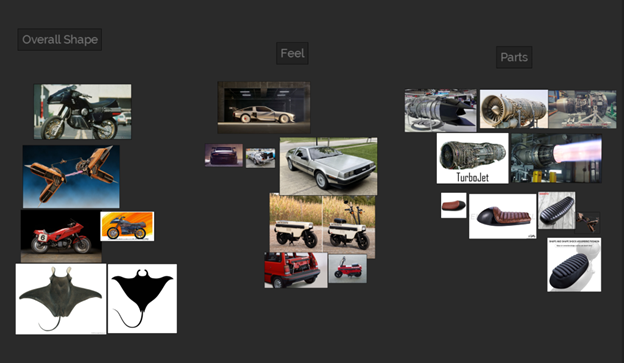
When getting started, we usually begin gathering references using Pure Ref to create a vision board for the asset we’re about to work on. We start by separating our images into different sections by general shape, overall feel, and detailed parts. When we approach a design, we try to always have in mind the visual language of our project – what shapes are recurring, the level of stylization, the color palette…
Mood board with gathered references
THE APPEARANCE OF A MODEL MUST INFORM ITS FUNCTION!
The hoverbikes need to convey they’re fast, so this needs to be respected throughout the design process. Vignetting (rough sketches of the planned asset for an overall idea of its look) and heavy iteration are always going to be a big part of the process, so don’t get too attached to a design. Be objective, prioritize what the project needs, what the asset has to convey, and try to see your work through the player's lens. Finally, it’s also important to use a character mesh as a scale reference while iterating, to not lose sight of the asset’s functionality.
Vignette prototyping and whiteboxing
ENTERING THE UNKNOWN - MODELLING THE HOVERBIKES IN 3D
The creation of a Hoverbike asset follows the same steps as highlighted in our previous blog post on The Art Pipeline, with a few key additions.
To do so, we need to create a RGB Mask by assigning a pure Red, Green and Blue value to every major colour group on the model during texturing. Using Substance painter and a custom channel.
Once the 3D modelling phase is complete, we create a procedural material to be able to change the colours of the asset in the engine in real time.
The resultant material with colors applied
The RGB mask used to define tunable colour regions and livery
QUESTING IN STYLE - EXPANDING HORIZONS
We then connect the vehicle to our character inside of unreal engine 5, using Sockets bound to the character’s Skeleton. Every hoverboard and hoverbike animation variant requires its own custom socket based on which bone it will attach to. In this case, the Hoverbike attaches to the pelvis bone.
A good way to create a skin for a vehicle is to refer back to color theory. We often use a color wheel to start off a skin idea. Using triads or complementary color combinations is a great way to create something iconic and very readable.
The shader we’ve built in Unreal engine allows us to simply pick the color of every part of the model based on the mask we created inside substance 3D painter.
Examples of colour variations ⬇️⬇️
For naming these colour variations, it’s as simple as channeling an inner poet. We choose a name that is both evocative and respects our world’s lore. For instance, you can see above the GT and Vapor skins. We’ll let you guess which is which!


