As development moves forward, organization and efficiency have become more crucial than ever. Even for a small studio like ours, it is vital to have a clear view of our workflow to ensure we are producing assets at the speed and quality we have envisioned for our games.
For this Dev Blog post, we share our art pipeline and explain the process we follow when creating assets (note that this process may change depending on the asset being created). In this case, we will be discussing a hard-surface prop (not an organic model such as a character). Let’s dive in!
1- Brainstorm: As a first step, we use rough sketches to explore different possible looks for the asset.
2- Concept: The chosen option is then conceptualized and approved for production. This concept will serve as a reference for the 3D artist when creating the assets.
3-White-box: White-boxes (temporary placeholders that share the same volume as the final asset) are created and added to the engine to help get the correct scale and fit. At this point, we can identify if the object’s size is correct, if it is properly visible, if it collides with other assets accurately or if there are any other conflicts to be corrected.
4-CHECK-IN: At this point, the white box is shown to the team members involved to get comments and critiques. This ensures that the asset is up to the team’s standards while keeping an eye for possible complexities overlooked on the first steps. Each team member has a different perspective on what new or unexpected work may come as a result of its integration in the game. For example, what will this asset need from Audio, Animation, Level Design, UI, and Programming?
5- “Low” Poly Model: Time for some modeling! A low poly model is a simple version of the object, and it is the one that will be used in the game. As the name suggests, this asset is made with a low polygon count, so it does not negatively affect the game’s overall performance. But this does not mean low quality! This asset will be tuned during the next steps, making it look great in the end.
6- “High” Poly Model: Now, it is time to create a high poly asset. This is a bulkier, much more detailed version of the same object, but it is not going to be in the game. We will later use this object’s details to make the low poly model (Step #5) even better!
7-CHECK-IN: Before moving on, it is necessary to evaluate the models in their final geometric state. Any needed changes to the asset should be addressed at this point, and, for this reason, our team gathers again to make sure everything is up to par.
8-UV Unwrapping: Things are starting to get complicated! How can we make our low poly model look as good as its high poly counterpart? In this step, we take the low poly model and unwrap it. We use software to transform it from 3D to 2D. So, the model becomes a flat surface that we can paint on, add more details, and use it for all sorts of things.
9-Baking: Baking is the process of applying the details from the high poly asset into the low poly model. Now, our low poly asset will look extra detailed while not costing as much as the high poly model in terms of performance!
10-Texturing: Using the same flat information from step #8, we can create textures that will make the final asset look great. Using a software called Substance, we paint, add extra details to, and basically define how the object will look!
11- In-Engine Import: Now it is the time to bring all of these into the game engine. In Unreal, we will combine all the materials (Textures and extra details) with the low poly asset! It is almost ready!
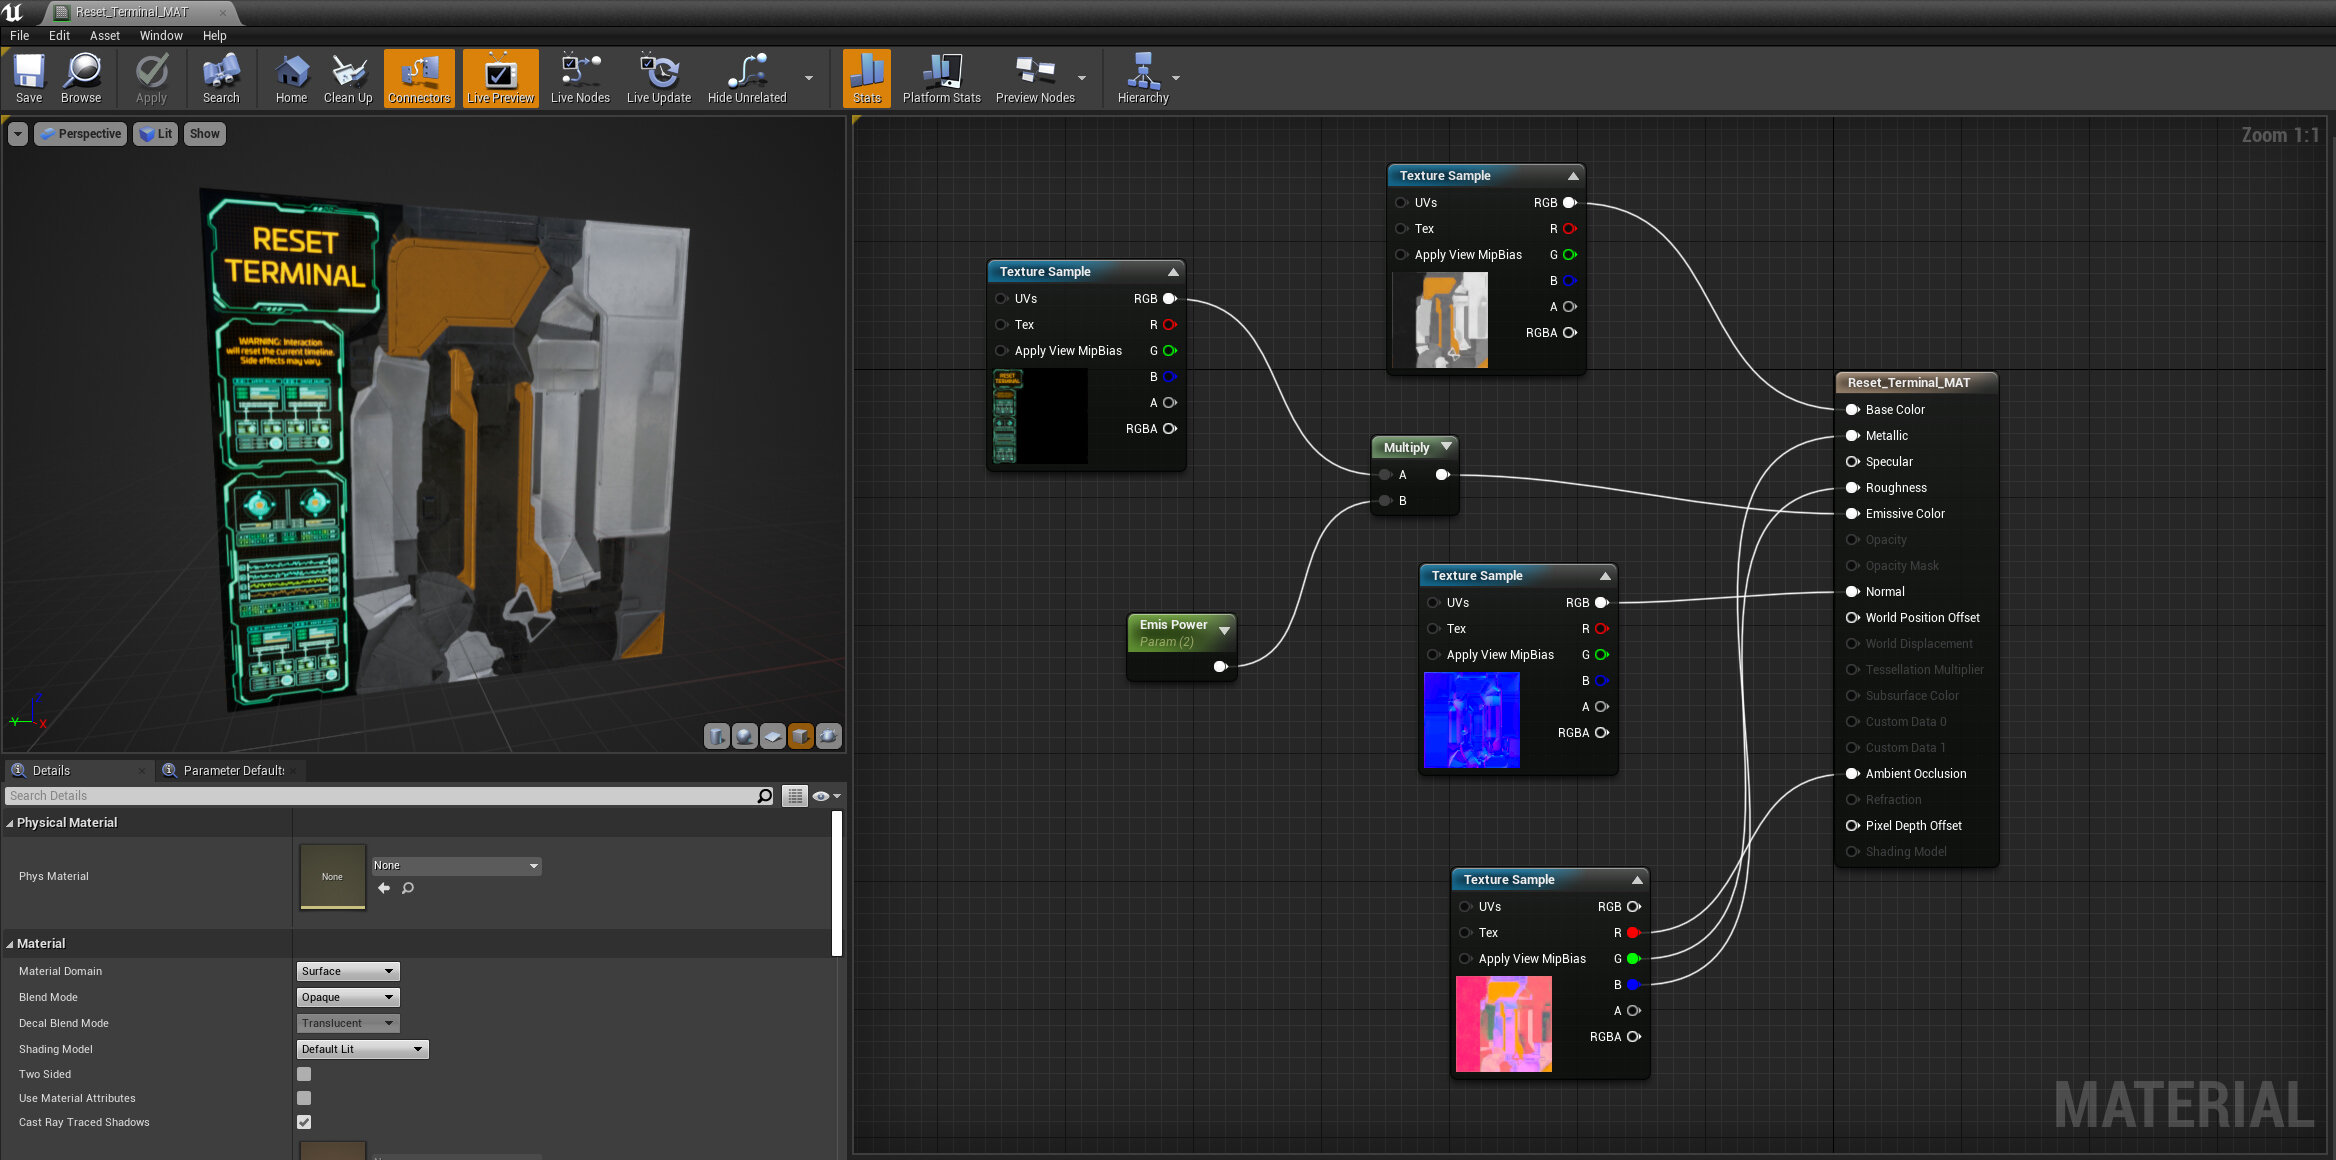
12-Material Application: Now it is time to put all the imported elements together! This process allows us to tweak existing textures and even define the type of surface from which the object is made. You can set its color, adjust how light affects it, animate the object, and much more.
13-CHECK-IN: At this point, the final check can be done. Any issues with the assets can be addressed, and adjustments can be made before submitting it to the main build. Everything should correctly display in-engine – we provide screenshots from the asset viewer in Unreal for this stage. Using third party software to showcase the assets is not an accurate representation of what the final product will look like in the engine. Better safe than sorry!
14-Submission: Once final edits are made, the asset can be submitted into the main branch to be used in-game!
As you can see, 3D asset production requires many steps to be completed. There are many variations to this pipeline, but this is the procedure we went through when creating this asset. Don’t forget, communication is vital to make sure no re-work needs to be done. Check-in regularly with your team, and your assets will look amazing!
Do you have any questions or want to know more about our art pipeline? Drop by our Discord server and ask around! We’ll be glad to help!